
If you have an injured finger, then you might need a finger splint to keep that finger safe.
Splints, in general, are orthopedic devices used to support injured or broken joints and bones. The main goal is to keep the bone in place so that it can heal in its original position.
Any form of cast or splint should always be administered and put in place by a licensed physician or a professional. Proper medical care after an injury or accident is a must as avoidance could lead to more serious consequences like further injuries and complications.
However, it does help to know what goes into finger splinting and how to do it step-by-step. This way, you can adjust and modify it at home, after you’ve seen a doctor.
Discover how to wear a finger splint, what the difference between casts and splints are, what types of finger splints are available and how to take care of your finger splint.
What is a Finger Splint?
A finger splint is a piece of medical equipment used to keep an injured or recovering finger in place. This will make sure that it’s protected from further damage or injury.
Finger splints are like casts, but they’re more flexible and are easy to put on or take off.
Finger splints can be made from different types of materials depending on the injury and usage. Some are made from foam and aluminum while some are made out of neoprene and polyurethane.
How to Splint a Finger: For Simple Finger Injuries
Though finger splints are used to treat broken, sprained or dislocated fingers, you must not do it yourself if you’re not a trained medical professional. Seek medical attention at once if you encounter any form of physical injury. Failure to do so can lead to serious consequences like paralysis or deformity.
However, knowing how finger splints work and having basic first aid knowledge can be helpful in emergency situations. The method below can be applied for simple finger injuries like a jammed finger or a lightly damaged tendon.
How to Splint a Finger
1. If the finger is cut, clean it under running water. You can use distilled water if available. Run it for a few minutes.
2. Apply first aid basics for treating cuts. Clean the wound with povidone-iodine like Betadine, and then put an antibacterial ointment on the wound.
3. Wrap the finger with clean gauze or a clean cloth.
4. Apply ice on the finger (wrap ice in a towel) to reduce swelling.
5. Never try to treat your broken finger yourself and immediately seek medical help if:
- You can’t move it
- It feels numb
- There’s broken bone or a bone is visible
- If the bone over the joints hurts
For a minor sprain, proceed to step 6.
6. Place the finger against a splint.
If you can’t see a doctor at once then you can splint the injured finger yourself until you see your physician.
You can buy a finger splint at your local drugstore or you can use a straight hard object like a clean tongue depressor.
Gently place it under the injured finger. Avoid applying pressure on the area.
You can also use the finger next to it as additional support by taping them together. This is a type of finger splint known as the ‘buddy splint’ which will help keep the injured finger straight as long as the uninjured finger taped next it is also straight.
7. Use medical tape to secure the finger and the splint together. You will secure the splint by taping it at two separate points: above and below the injury. Wrap the medical tape around each point 3 to 4 times.
Make sure that it’s secure, but not too tight that it prevents good blood flow.
8. Continue to apply ice to the injured finger. Apply ice to the injured area. Make sure to wrap a towel around it as you wouldn’t want to apply ice straight on your skin.
The pain should start to disappear after a day or two. If not, then immediately go to your doctor and seek professional help.
What is a Finger Splint For?
For people with a finger injury, who have undergone finger surgery or who have osteoarthritis or strained fingers, a finger splint is necessary to protect your finger and help the injured tissues rest.
By immobilizing your injured or recovering finger, you’re helping it recover faster without developing any kind of deformity.
Here are some conditions that will need finger splints:
- Broken fingers
- Strained fingers
- Finger sprain
- Tendonitis
- Trigger fingers
- Mallet fingers
- Arthritis-related issues
- Other tendon-related conditions
- Post-surgical tendon repair
Types of Finger Splints
- Buddy Splint. The Buddy Splint is a type of splint that involves two fingers joined together. People often use these when they have strained their finger-like from a jamming injury. This type of splint should not be used on broken or fractured joints as this may cause permanent damage or paralysis.
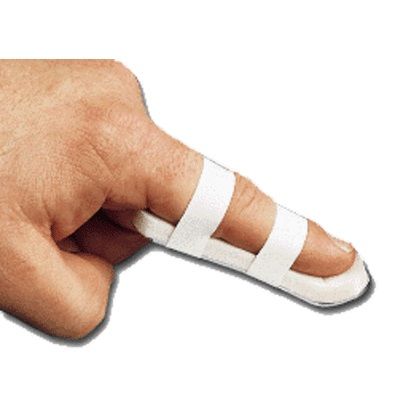
- Stack Splint. One most common type of splint for finger injuries is the stack splint. It’s mostly used for mallet injuries, but it can be used for conditions like Trigger Finger. They are used as a way to support the finger straight to prevent bending at its first joint.
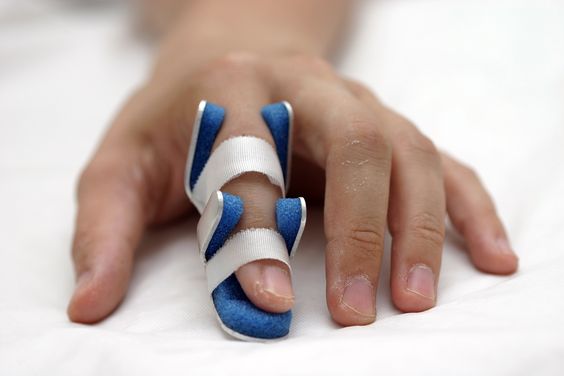
Stack splints are made of plastic pieces that have small holes in them which then promote better airflow, making this type of splint very comfortable. - Static Splint. For tendon damage and fractures, a static splint is mostly recommended. It’s designed for holding a joint in place so it does not move around or change shape.
You can find metal and foam ones at your local pharmacy, but if you want something more custom made then there’s the moldable plastic variety available too. - Dynamic Splint. This type of splint increases the arc of motion of the injured finger and decreases resistance to finger extension. They’re also suitable to wear at night or when you need some rest and relaxation.
What Does a Doctor Do When Your Finger Bone is Fractured?
Always call your doctor immediately if you have an injured finger. Your physician will immediately assess the severity of you injury and apply the necessary treatment.
In some cases, they might have to realign it before putting it in a splint. A doctor will diagnose a broken bone with an X-ray. The treatment will depend on the extent of the injury. Surgery may be required for more serious cases, however, there are injuries where your doctor can put the bone back in place without surgery.
In the case of a finger sprain, doctors will assign it a grade according to how bad the injury is:
Grade 1: You have some micro-tearing in your ligament, but the joint is fine.
Grade 2: There’s partial tearing in your ligament and there’s some mild instability in your finger joint.
Grade 3: You have a completely torn ligament and your joint is severely damaged or unstable.
After the surgery or treatment, your doctor will then decide what kind of splint will best suit your injury. If you have a cut on your finger, then your doctor might recommend for you to get some shorts for tetanus or oral antibiotics to prevent further infection.
How Do I know if I Need a Finger Splint?
For milder cases like a light sprain caused by minor accidents, you can determine if you need a finger splint if you have the symptoms listed below.
- You have pain in one of your finger joints every time you try to move it.
- You have trouble bending or straightening your finger.
- There’s tenderness in your joint which you can feel when you touch the area.
- There’s swelling in your finger joint.
There are people who ignore the pain and expect the mild injury to heal on its own. However, just to be sure, place it in a splint for a day or two. If the pain persists, then you should go to your doctor at once.
Heal Faster with RICE: Rest, Ice, Compression, Elevation
If you experience any form of a finger injury, always make it a point to see your doctor first. For a faster recovery, make sure to follow the R.I.C.E method.
- Rest your injured finger the second it gets injured.
- Ice it within the first 24 hours. Make sure to avoid placing the ice directly on your skin and apply it to the area with a 15 minutes interval.
- Compress it with an elastic bandage, depending on your doctor’s recommendation.
- Elevate your injured finger during the first 24 hours after the injury.